When you are a beginner with the art of water marbling, designs can be daunting. But here are 5 designs that are great for a beginner! You only need a 1 inch symmetrical rake and a freehand stick!
Arch Design
1. Add base colour
2. Add droplets of paint to create the stone pattern
3. Use a 1 inch symmetrical rake right -> and adjust half inch over and pull rake thru left <-
4. Lift rake out of tray and adjust rake and pull one time top to bottom of tray
5. Print your design
Gelgeht Design
1. Add base colour
2. Add droplets of paint to create the stone pattern
3. Use a 1 inch symmetrical rake right -> and adjust half inch over and pull rake thru left <-
4. Lift rake out of tray and adjust rake to the top of the tray and pull to the bottom adjust half inch over and pull up to the top of the tray
5. Print your design
Windy Design
1. Add base colour
2. Add droplets of paint to create the stone pattern, In this design I add colours in rows, to create the seperation of colour along the left and right side.
3. Use a 1 inch symmetrical rake right -> and adjust half inch over and pull rake thru left <-
4. Lift rake out of tray and adjust rake to the top of the tray and pull to the bottom adjust half inch over and pull up to the top of the tray
5. Using a freehand tool add swirls along the edge of the tray
6. Print your design
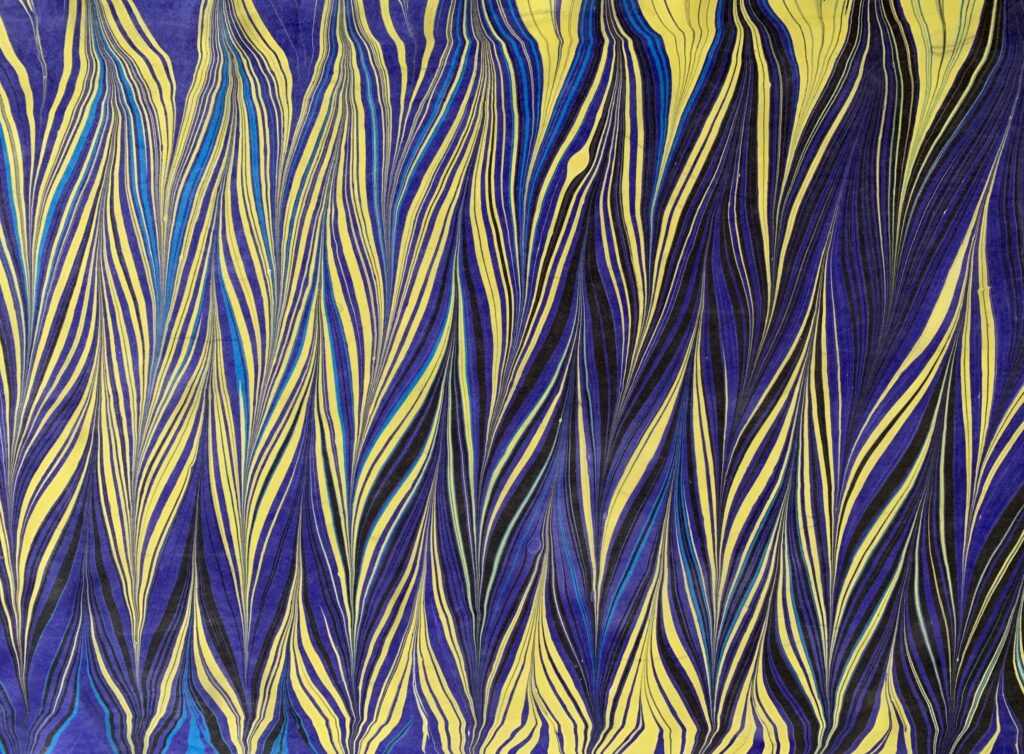
Feather Design
1. Add base colour
2. Add droplets of paint to create the stone pattern
3. Use a 1 inch symmetrical rake right -> and adjust half inch over and pull rake thru left <-
4. Lift rake out of tray and adjust rake to the top of the tray and pull to the bottom adjust half inch over and pull up to the top of the tray
5. Using the freehand tool left to right create a wide S at the top and bottom of the tray
6. Print your design
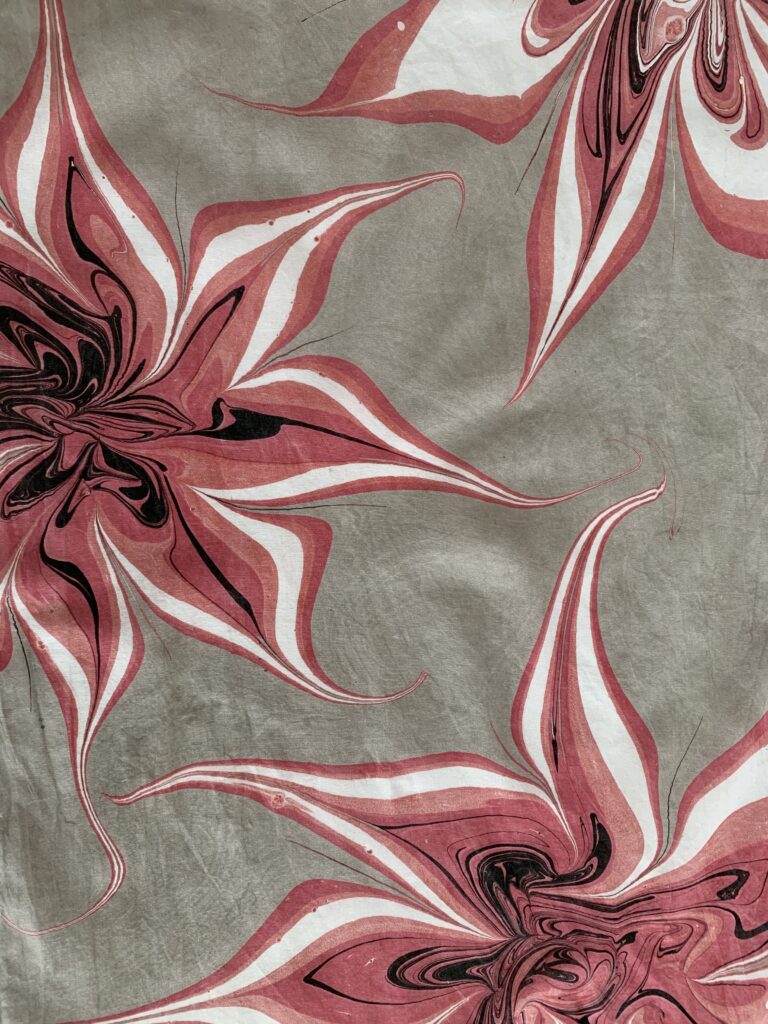
Flower Design
1. Add base colour
2. Add first colour to create your flowers. Subsequent colours will be added within the first colour. NOTE-You can add first drops of multiple colours to add interest for new flowers
3. Now you will do these steps on each individual circles of colour. a-using your freehand tool cut from the outside to the center from the top, bottom, left, and right. b-using your freehand tool cut from the outside to the center betweeen each of the lines you created. c-to create the elongated petals you will use your freehand tool to pull the tip of the rounded petal out from the tip away from the flower. d-to created the interesting center you can swirl the center slowly.
NOTE-Slow movements are really important to keep the thickness of your flower.
If you can write your name with a pencil you can make magic with water marbling! But remember if your design turns out differently just give it a new name and call it a win. There are no mistakes in water marbling! Happy design making!!